Showing posts with label Sewing Projects. Show all posts

Wednesday, September 19, 2012

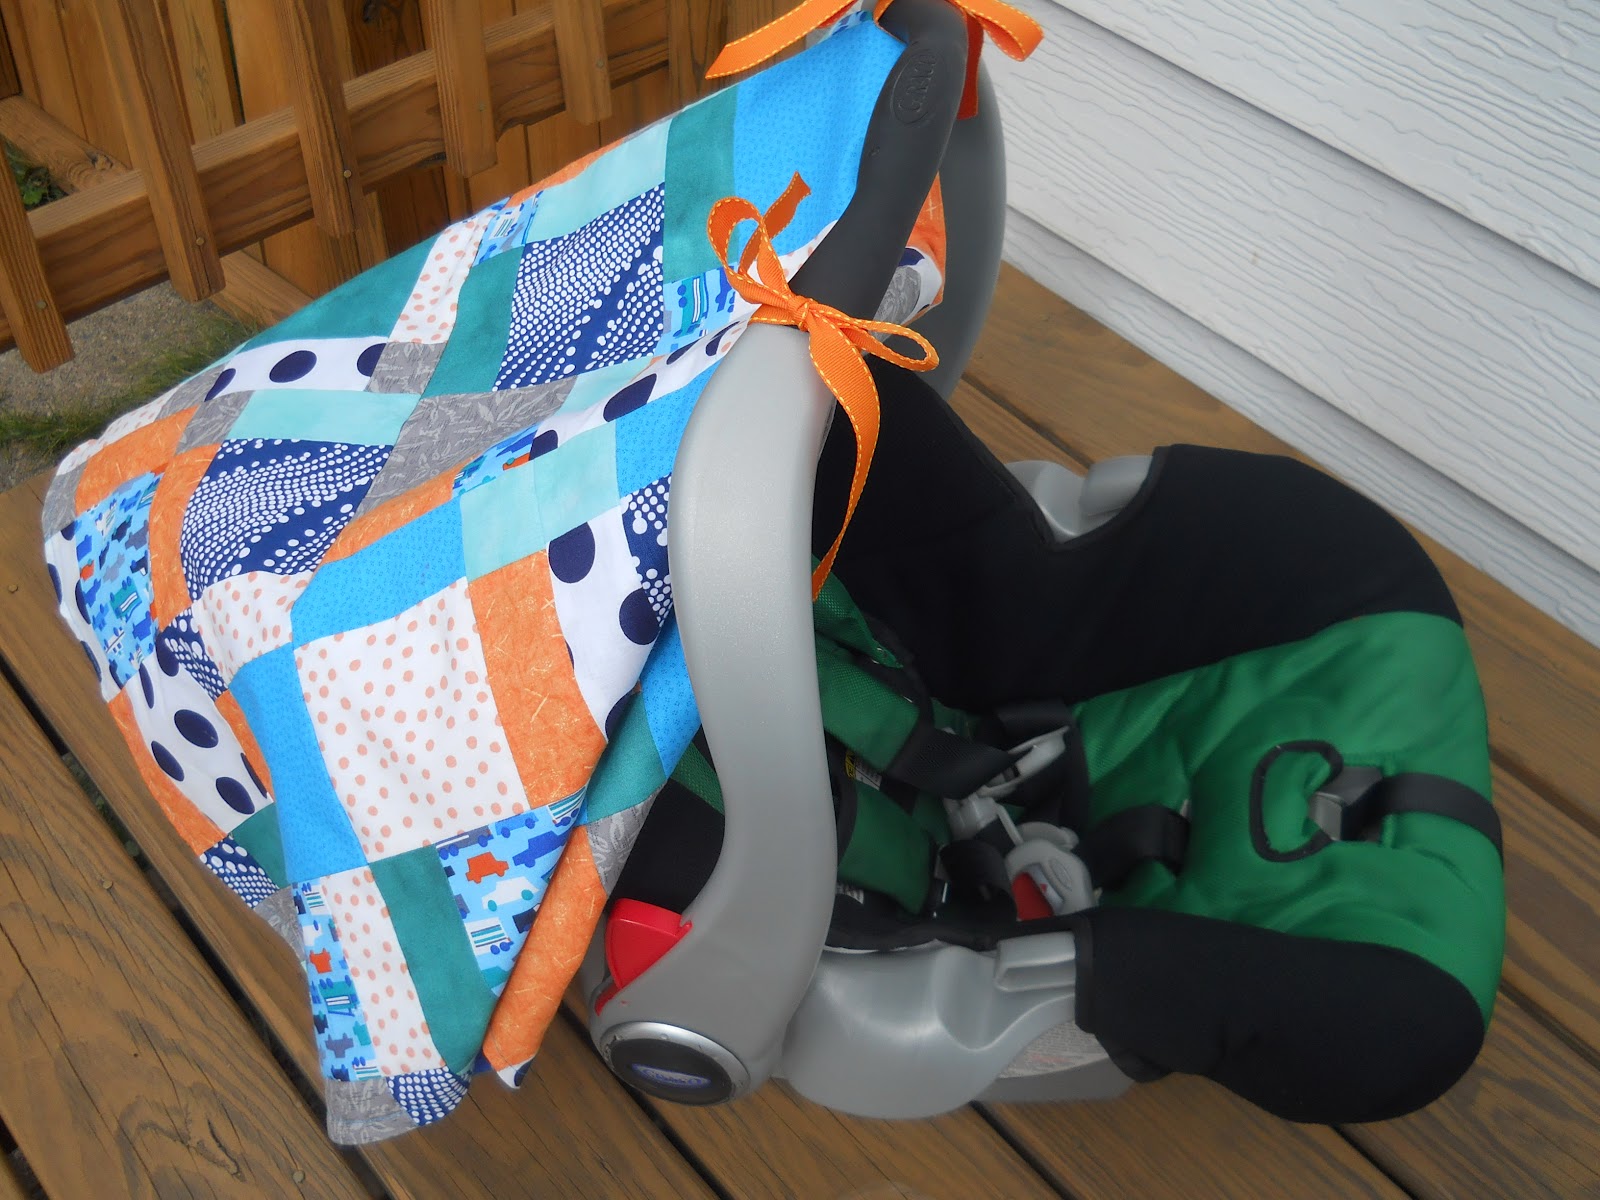
"Around the Town" Quilted Carrier Canopy

My local craft group got together for the first time last week.  One of the projects suggested to have been working on was a quilt block called the Disappearing 9-Patch.  Since I haven't quilted in quite a few years -- a decade, really -- I decided to take on this one.  But instead of just making a quilt, I made the pieced top into a canopy for Jed's car seat carrier.

Here's the tutorial link, and the pictures below are my finished project.  I opted to not quilt the whole thing, but just topstitched around the outer edge, just to save some time.  The top is quilter's cotton, and the reverse is cotton flannel.  I have titled this one "Around the Town".


Tuesday, September 11, 2012

Quilting Again

Facebook hooked me up with a local crafting group online, and we like to post pictures and tutorials of all our craftiness in the group forum.  We are finally getting together for a craft night this week.  One of the challenges that the leader of the group gave us was a Disappearing 9-patch block.  
You make a 9-patch block, then cut it in quarters.  Then you can spin the quarters around, mix it all up and sew it back into a square for a block that makes it look like you did a lot more work than you really did.  My kind of quilt block.  It has been MANY years since I did any quilting, so it's been interesting getting back in the swing of it.  Not to mention that the kids lost my rotary cutter ... grrrrr.

So, my squares aren't that square.  And they don't all match up.  Oh well.  I'm a beginner, and it's a fun outlet for my insanity.  I've got 5 of 12 blocks done.  After it's all pieced, I plan to make a car seat carrier cover out of it.  I'll post finished pictures once it's done, but here's what I've got so far.

My niece, Brenna, is learning to quilt too.  She's 13, and I have no doubt this is something that she'd be able to do to.  

It's an easy first time project if you're wanting to start the quilting journey.  Here's the tutorial that I used from the challenge.


Wednesday, September 28, 2011

Sew Much More Time!

Now that I've switched to my new school day, I find that I have time to do things again.  Things that I love, like home improvement and crafty schmafty stuff. 

Most of you know that I love cloth diapers on the kiddos.  Lately, things were so hectic that I had Isaac in disposable diapers just to save time.  We have more time on our hands now, so back into the cloth he went.

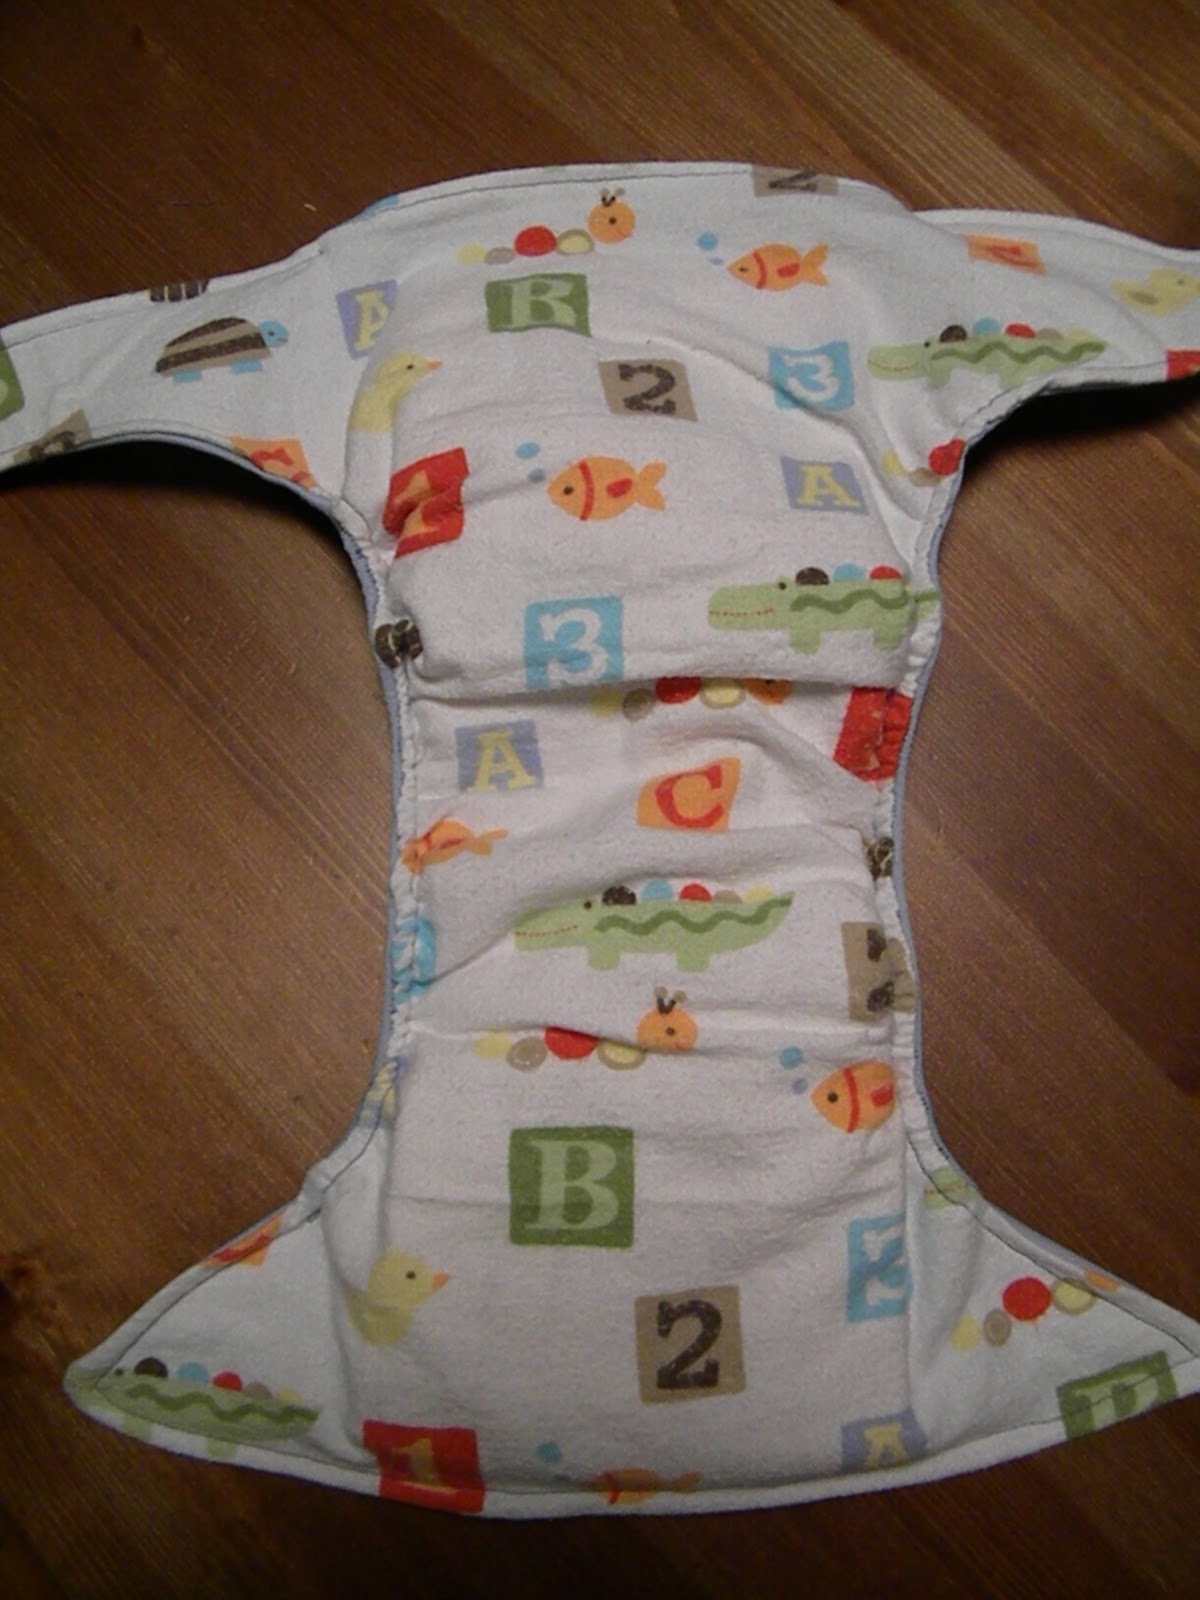
And the search for the best diaper pattern continues.  This is my latest AIO pocket diaper.


The outer is 1 mm PUL, with 16-gauge snaps.  Next time I make it, I will add hip snaps.  The shell pattern was based on a SmartiPants diaper that I stretched out and traced.  The inner is flannel, which wicks moisture away pretty well.  In this case, it's made out of a receiving blanket Isaac had as an infant.  Not a bad way to upcycle.  :)  The soaker loads (haha) through the back of the diaper.


Things to do next try:  hip snaps and sewing a "channel" that the soaker would feed into, rather than stuffing in between the layers.  In other words, a casing of sorts sewn to the flannel inner lining to hold the soaker.  I'll point it out on the next go-round.

Wednesday, April 20, 2011

Easter Procrastination

You know what they say ... procrastinators are the leaders of tomorrow!  And so, being Chief Procrastinator, I have put off sewing the Easter outfits for the kids.  The rush is on to complete the last two dresses, but this is what I've done so far.  


Isaac's grass green shirt will coordinate with the girls' dresses.  This was a first of many things for me.  Button holes, pockets, sleeves and collar.

Riley's dress for Easter is satin, with black trim.  The dress also presented a first for me:  a zipper.  But all went well, and I am thankful for it.

The bodice of Riley's dress.
All I need to do now is get the other two dresses done by Saturday night.  I think I can, I think I can.  :)

Thursday, March 31, 2011

Upcycled Laundry Bag

One of the benefits of children growing older is their ability to learn new jobs and take on new responsibility.  It's great that I get to teach my kids valuable lessons they'll need for the rest of their lives ...


... and laundry is a biggie.  


Especially with three girls.  The older two produce mounds of dirty clothes.  Previous solutions were individual laundry baskets and then later, one community basket.  Baskets, stairs and shorter limbs only complicate the problem of getting the dirty laundry to the washing machine in the basement.


My newest idea was to use laundry bags.  Once it's full, they can just roll the bag down the two sets of stairs and drag it to the washing machine.  And then once their clothes are dry, reverse the process.  I had a couple of bags on hand, so no big deal.  Until wash day came and I realized that I needed spare bags for their newly dirty clothes while the others are washing.

Thursday, March 24, 2011

Brooke's Easy Smocked Dress

This one is so simple ... a great project for a beginner.  If you can sew a straight stitch, then you can do this one. The material is pre-smocked on the bolt, so you just need to measure out how much you need for the person (wrap it around them or yourself).  I like to add six inches to that just to be sure.


Wednesday, March 23, 2011

Diaper Attempt #3

My own design for a cloth diaper, in that I fiddled with a couple of others and squished them together to produce this one.  


Outer layer is waterproof PUL with snap closures.


Inside layer is a store-bought prefold diaper.  No pockets on this one.  Just a real all-in-one.
This time I didn't add a pocket, just to see how it works.  And I'm not sure on the legs, whether the material will chafe.  But we'll see.  Reviews to come.  


Review #1:  Shoulda put some elastic in the back waist area.  Gaps a bit.


Monday, March 21, 2011

And now ... Brooke's Pillowcase Dress

I wrecked one shirt by cutting it too short in the width, so I moved on to the last one I purchased at Salvation Army.  Same concept as the other mens' shirts conversions.


I absolutely love the navy and white stripes in this one.  My favorite out of all of them.

I think Brooke is happy with the dress too.
Man, this has been one productive sewing day!  What a great way to spend my birthday.

My Corner of Heaven

My birthday treat to myself was to sew in my completely child-proofed dedicated sewing area.  It's awesome!  I can sit and sew and not have to worry about monkeys unplugging machines, getting fingers cut off in the serging blade, or all my spools of thread being unwound.  This little nook o'mine is so incredible that I finished THREE projects today.  Happy Jenny today!  Not so happy about turning 35, but I hear it's the new 25.  Hmmm.

Savvy's Pillowcase Top

As promised, Savvy's pillowcase top.  Not quite as billowy as Riley's but still cute.  More A-line, I think.


Originally this was a men's button-down long sleeve shirt from Aeropostale.  Picked it up at Goodwill for $1.50.

This time I used the front buttons AND the hem.  I finished the arm holes with bias tape instead of serging and turning.  I like it this way better, and honestly it was easier.

Pink, blue and chocolate pinstripes are just perfect for my Savvy Girl.

Brooke's Pajama Capris

After much begging and pleading, Brooke's pj capris are done.  And so cute too!  She wanted to pose for a couple of pics, and I was happy to oblige.  


Friday, March 18, 2011

From Button-down to Pillowcase Top

Yesterday's sewing project:  turning a Goodwill men's button down shirt into a pillowcase-style shirt for Riley.  Pretty simple.  I even used the existing armholes for the shape of the new ones.  All I did was hold up the shirt to Riley, make some mental calculations, cut and sew.


Hopefully in another post I can explain how simple this kind of top is.  My good friend Mandy Geiger has made a business out of making pillowcase dresses.


The shirt before the big cuts


I love plaid, and this one screamed little girl to me!


Detail view of the top of the shirt.  Notice the buttons?  They make a cute accent.


The final shirt.
 This was a fun project, and it only took about 45 minutes start to finish.  Like I said, I'll explain the how-to in another blog.  But for now, I've gotta get ready to head to Duluth.


Have a great day!

Wednesday, March 16, 2011

PJ Pants Take 1

Today's sewing project:  flannel pants for Isaac.  A very simple two-piece pattern from McCall's.  Of course, the tracing of the pattern onto the waxed paper -- to preserve the original -- took about three days because of grabby little paws.  


Total time spent from tracing the pattern to sewing the last autolock stitch:  about 35 minutes.


Friday, March 11, 2011

Recycled Napkins

Today's sewing project:  cloth napkins!

I've gotten somewhat adept at the serger, cranky as it may be.  It was the fastest and easiest choice for this project  Of course, I forgot to take a before picture.  

I found a round tablecloth at Goodwill, on sale for $1.50.  Since grubby hands like to pull tablecloths off tables and I don't have a round one, I bought it simply because it was the best material and I loved the pattern.

It was a Martha Stewart Living cloth done in purty a blue and white floral motif.  Using my rotary cutter and cutting mat, I cut 16" squares out of the cloth, taking advantage of as much material as I could.  Cutting squares out of a circle can be a challenge to the mom-bogged mind, as simple as it sounds.

Once the squares were cut, I just serged around the edges.  Used some Fray Check at the corners where I had to cut the overlock loops.

Here's the final results:


There are two napkins that have the big floral pattern, and the other six have the small blossoms only.  I like the way these turned out, and will be on the lookout for more potential napkins when I'm treasure hunting.  
Have a crafty day!

Thursday, March 3, 2011

Diaper Attempt #2: Success!

Different pattern, slightly better diaper.  I still haven't put the snaps on the first one, and I'm really not sure that I am going to waste the effort. 

I like the way this one turned out:

Outer layer is flannel, with a PUL layer underneath that.  The snaps weren't too hard to attach.  Only screwed up one.

Not sure if I will need to add hip snaps or not, but this one is supposed to be the 12-18 months size.  I adjusted the pattern to snaps.  It called for a velcro/aplix closure.

My top stitch was a bit wide on the crotch elastic area, but I can correct that with the next one.  The inner layer is white suedecloth, good for wicking to the soaker in the pocket beneath.
Not a bad effort, all in all.  I think with the next one I'll make some adjustments to the width of the side flaps.  But I like the way it turned out, so I may stick with this pattern for a little while.  The pattern is by Jalie, and you can find it here.

Wednesday, February 23, 2011

Cloth Diaper Attempt #1

While awaiting my supply order to arrive, I sought out a free online diaper pattern to try for Isaac's cloth diapers.  I'm on a mission to produce a good cloth diaper for less than $5.  

I found this diaper pattern on another blog.  It's a pretty simple pattern that doesn't call for closures of any kind except a pin.  I had a Snappi stretch closure, but it really didn't work for me.  I discovered that next time I will use Aplix or snaps for closures.  But it was a good first attempt.  By no means is it close to great, but it will work once I get my snaps and pliers in the mail.

I used a receiving blanket I already had for the flannel inner layer.  This is a pocket diaper, so it is stuffed with a Chinese pre-fold that I had laying around.

Instead of using two flannel layers and covering with a diaper cover, I chose to use PUL for the outer layer.  Since that is waterproof, it eliminates the need for a cover.


Once it's folded, the suggestion is to use a pin to close it. 
I didn't have a large enough safety pin, so I used the Snappi I had on-hand.  It didn't work for long with an extra-active little boy.

I just love cloth diaper butts!
I learned a lot about the design and construction of the diaper on this first try.  That knowledge should help me create a better one in the future.  So the quest continues.  I just wish the shipment would hurry up and get here!


Monday, February 21, 2011

Doll Dresses

I'm only a couple months behind making the 18" doll dresses for the girls.  Amazing that I actually made them at all.  Ha!  You know what they say:  Procrastinators are the leaders of tomorrow.  I even made one for a friend's daughter.  These are super easy.  Just two pattern pieces -- took less than 30 minutes from pinning the pattern to trimming the threads.

Pink and white daisy dress for Savvy's doll
Made for a friend's daughter

Denim and postcard print dress for Riley's doll

 Maybe more will follow.  Savvy is already begging for a vest out of the faux leather I have.

Sunday, February 6, 2011

Stuffed Shirt #1

What to do with a shirt that the kids has outgrown but refuses to pass it along to little sister?  One with sentimental value ... "Aunt Kanny GAVE that to ME!"  Well, make it into a pillow.  

I have to say that I thought this would be one of the easiest projects ever.  And it was easy.  Until my sewing machine broke.  Ugh.  Oh well, the bottom of the shirt was stitched close using a double-running embroidery stitch with all 6 strands of the embroidery floss and a large needle.  Easy peasy.

Riley's Stuffed Shirt Pillow

Stuffed Shirt #2

Thought I'd post pictures of Savvy's Stuffed Shirt Pillow.  She (of course) had to have one just like her big sister.  We picked a favorite shirt that no longer fit.  Since my machine broke on the last project, I handstitched the closures with a double running embroidery stitch.

I fully expect to be making one for the littlest sister soon.  :)
The shirt before the stuffing

After stitching and stuffing

Detail of double-running embroidery stitch

Sunday, November 28, 2010

The First of Many ... Hopefully

Now that I own 7 18" doll clothing and accessories patterns, I decided it was time to get to work on making mini-things.  First ever doll project was this doll purse.  Took as long to make as altering Riley's pants as seen in the previous post.  But cute!